
How to Create and Edit Categories in Your QuickBooks Online Chart of Accounts
If you’ve ever wondered whether you’re using the right categories in QuickBooks Online, you’re definitely not alone. One of the most common questions I’m asked is how to set up and edit categories properly in the Chart of Accounts, especially now that the QuickBooks Online interface has changed again. Your categories control where transactions land on your Profit & Loss and Balance Sheet, so understanding how they work is one of the most important steps toward accurate and useful reports.
When the layout shifts, it can be confusing to know where everything is or how to make changes. In this post, I’ll walk you through how to create new categories, how to use them correctly in your transactions, and how to edit existing accounts when something is showing up in the wrong place. You’ll also see how these changes flow straight into your reports so that you can feel confident about the numbers you’re relying on.
Why the Chart of Accounts Matters
Your Chart of Accounts is the backbone of your bookkeeping system. Every income, expense, asset, liability, and equity item is organized here. When these categories are set up correctly, your reports will clearly show how your business is performing. When they’re not, it becomes much harder to make sense of your financial picture. The good news is that once you understand how these categories work, QuickBooks Online becomes much easier to navigate.
Creating a New Category in QuickBooks Online
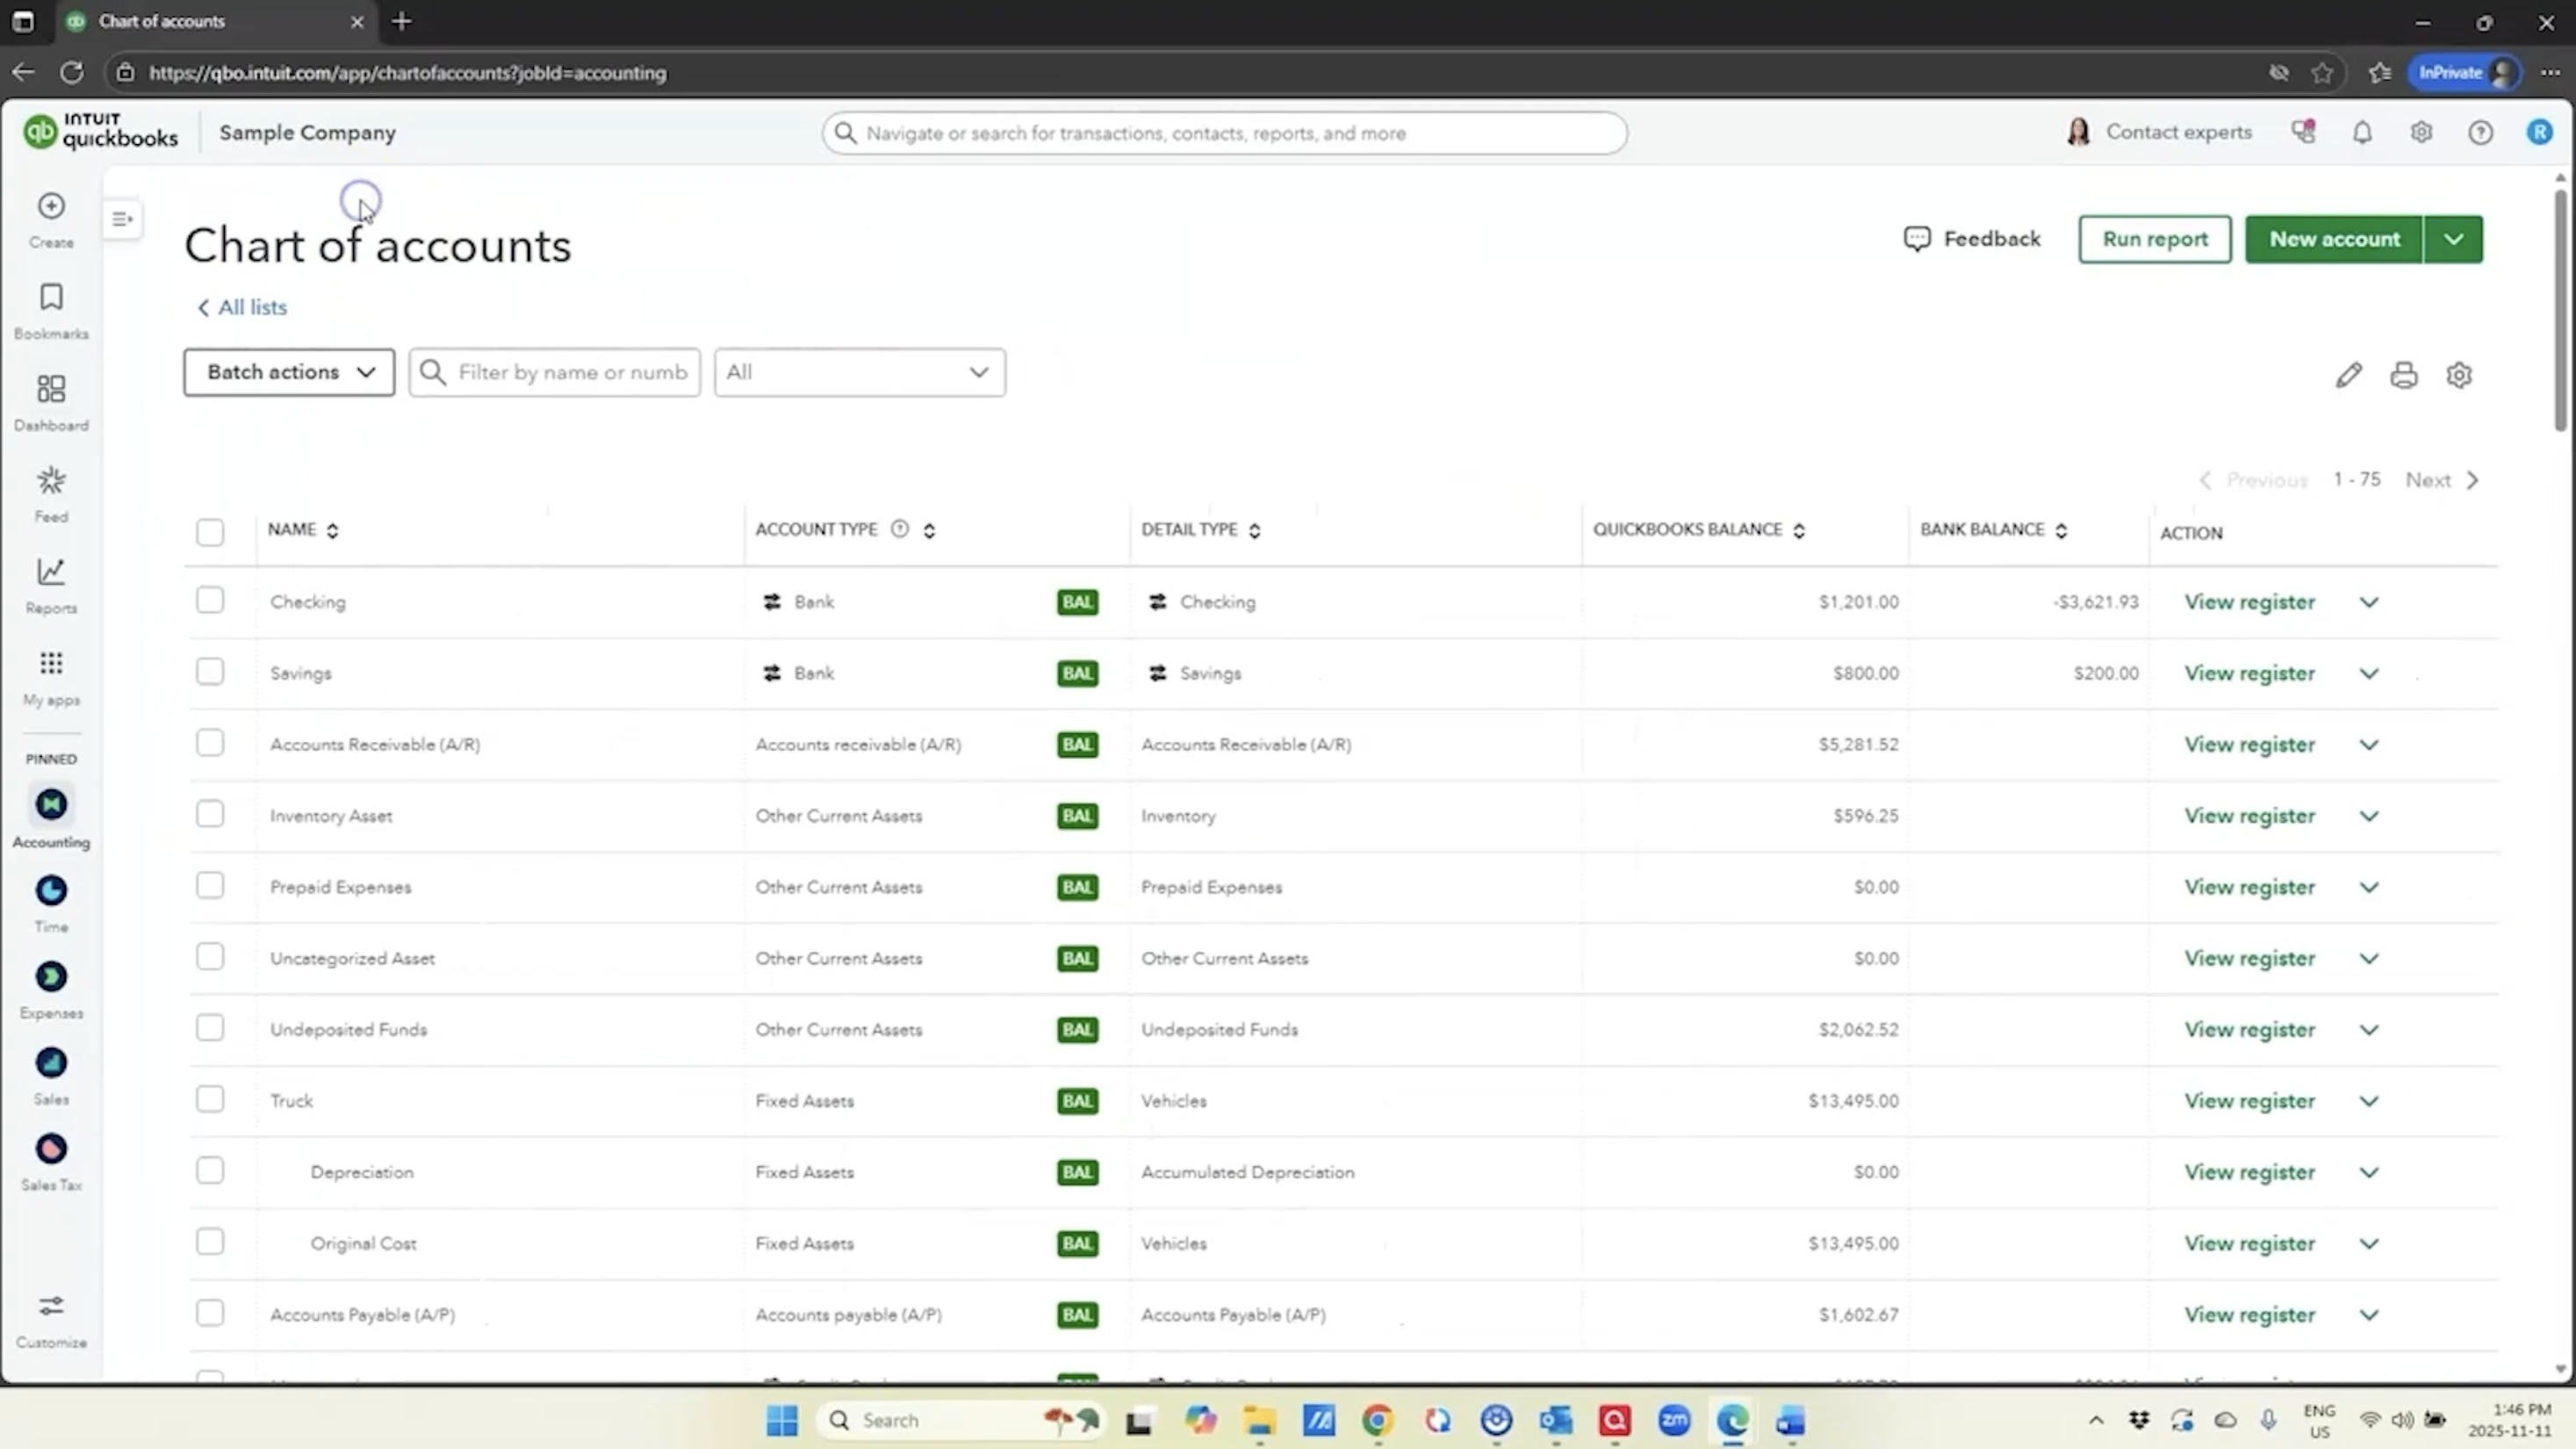
To create a new category, start by opening your file and navigating to the Chart of Accounts. Depending on how your navigation bar is set up, you can get there either from the left-hand menu or through My Apps → Accounting. Once you’re in the Chart of Accounts, you can create a new account by selecting “New” at the top right corner of the screen.
From here, you’ll name the account and choose the appropriate Account Type. For example, if you’re creating a category called Credit Card Fees, the correct type is Expense. The preview panel at the bottom shows exactly where the account will appear on your Profit & Loss report, which is extremely helpful for visualizing the end result.
You’ll also be asked to choose a Detail Type, which many users tend to overthink. It doesn’t dramatically affect your bookkeeping, so choose the one that makes the most sense (for example, Bank Charges works well for Credit Card Fees). You can also decide whether the account should be a stand-alone category or a sub-account. Sub-accounts can help with organization, but posting expenses to the header account as well as the sub-account can make your reporting messy. When in doubt, keep it simple.
Once you save the account, it becomes available for use throughout QuickBooks.
Using Your New Category in a Transaction
After you’ve created the new category, it’s a good idea to record a test transaction so you can see exactly where it lands on your Profit & Loss. For example, if you post a $15 credit card fee as an expense, QuickBooks will place it under the category you created. Running your Profit & Loss afterward helps you confirm that everything is working the way you expected. This step is a helpful habit any time you modify your Chart of Accounts.
Editing Existing Categories (and Fixing Common Mistakes)
Sometimes categories are simply set up incorrectly, either because of old data, migration issues, or the changes QuickBooks makes to its interface. One of the most common issues I see is that job-related costs end up in the operating expenses section when they really belong in Cost of Goods Sold (COGS). These might include job labor, installation, maintenance, repairs, materials, or equipment rentals. When these items are buried in the Expenses section, your gross margin becomes misleading, and it’s harder to understand the real cost of delivering your service.
Editing these categories can require a few steps. If the category you want to change has sub-accounts, QuickBooks will block you from changing its account type. To work around this, remove the sub-account structure temporarily, adjust the parent category to the correct type (for example, Cost of Goods Sold), then reassign the sub-accounts underneath it. QuickBooks may prompt you with warnings—simply confirm you know what you’re doing and continue. Once everything has been moved, your Chart of Accounts will reflect a more accurate layout of your business costs.
How These Changes Affect Your Reports
Once you’ve finished creating or editing categories, revisit your Profit & Loss report. You’ll be able to see how your total income flows into Cost of Goods Sold, followed by gross profit and then your operating expenses. When categories are set up correctly, this layout gives you a much clearer understanding of how your business is performing. It becomes easier to diagnose issues, identify opportunities to adjust pricing, and understand where your money is going.
If you see job materials, equipment rental, or other direct costs still sitting in the operating expenses section, it’s a sign that additional cleanup is needed so your reports reflect reality.
Getting your Chart of Accounts organized is one of the most impactful things you can do for your bookkeeping system. Accurate categories make your Profit & Loss far more meaningful and give you better insight into the health of your business. You don’t need perfect detail or overly complex sub-accounts—clarity is the goal. Once your categories are set up correctly, your reports become powerful decision-making tools.
Take your time, make thoughtful changes, and always run your Profit & Loss afterward to confirm everything is landing where it should. As QuickBooks continues to update its interface, understanding these fundamentals will help you stay confident and in control of your numbers.
Compare Quickbooks plans: https://www.mycloudbookkeeping.org/quickbooks-plan-comparison
Download my small business month-end checklist: https://learn.mycloudbookkeeping.org/small-business-month-end-checklist
Book a free consultation with me: https://www.mycloudbookkeeping.org/consultation
Still need help?
Check this out.
Let's go!Still need help?
Book a session! We can work together to solve your specific QuickBooks Online questions.
Let's go!Hi, Kerry here from My Cloud Bookkeeping. I work with small businesses and entrepreneurs to help them get set up in QuickBooks Online. One of the main questions I’m asked is, “How do I categorize things properly?” And as you may have noticed, the interface in QuickBooks Online has completely changed again. So I thought it might be time to revisit how you can add and edit your categories in the Chart of Accounts.
The categories in the Chart of Accounts feed your income statement and your balance sheet. At the end of this video, I’ll show you how to run your reports to make sure the information flows through as it should and that your reports are accurate. Be sure to stay to the end so you can understand the results of all your hard work.
Here we are in the sample company. Find your way to Accounting—either in your pinned items or through My Apps → Accounting—and we’re going to open the Chart of Accounts. Once it’s open, you can collapse the navigation bar to give yourself a little more space. Select “New Account” at the top right. I’m going to create an account called Credit Card Fees. The account type is an Expense, which makes sense. The preview at the bottom shows you where it will appear on your Profit and Loss, and in alphabetical order within that section.
When choosing a detail type, please don’t overthink it. I’m selecting Bank Charges. You can also choose whether to make this a sub-account. If I made Credit Card Fees a sub-account of Bank Charges, you’d see it appear underneath in the preview. I’m not going to do that, because I don’t like to post expenses to a header account—things can get messy. So I’ll save this.
Now let’s use the new account we’ve set up. Elsewhere in QuickBooks, these are referred to as “categories,” which can be confusing because they are also accounts in your Chart of Accounts. Let’s create an expense and use the new category. I’ll choose my checking account, enter today’s date, and use the Credit Card Fees category for a $15 charge. Save and close.
Next, I’ll run a Profit and Loss. I always like to go straight to the report after creating or editing a category so you can see where your entries appear. Here’s our Credit Card Fees for $15 under Expenses. This is how you can verify that what you’re doing is flowing through correctly.
Now let’s look at how to edit categories. You may use the navigation bar at the top to move around—there are many ways to get to the same place in QuickBooks, so use whatever works best for you. Editing an existing account is useful when you want to change the name, the account type, or make it a sub-account.
Scrolling into the Expenses section, you’ll see several job-related expense accounts—job expenses, cost of labor, installation, maintenance, and repairs. Typically, these belong in Cost of Goods Sold, and it’s a very common error to see them sitting in operating expenses. These items should be deducted from income so you can see your gross margin.
To change this, I’ll first try to edit the Job Expenses account. When I change the account type to Cost of Goods Sold and click save, QuickBooks warns me that I can’t do this because it has sub-accounts. That’s expected. So I’ll scroll back down and make note of the sub-accounts—maintenance and repairs, installation, cost of labor. I’ll need to remove them as sub-accounts first.
Editing each one, I’ll uncheck “Is sub-account” and save. After removing the sub-account structure, I can go back to Job Expenses and change the account type to Cost of Goods Sold. Now the change saves successfully.
Next, I’ll reassign the previous sub-accounts under the updated Job Expenses category. For each one—cost of labor, maintenance and repairs, installation—I’ll edit the account, change the account type to Cost of Goods Sold, and make it a sub-account of Job Expenses. QuickBooks will now place all of these costs in the correct section of the Profit and Loss.
There are also other job-related accounts such as Job Materials and Job Equipment Rental that should be moved as well. I’m not doing all of them in this demo, but the process is the same.
To see the impact, let’s look at the Profit and Loss again. Now you’ll see your income, then Cost of Goods Sold (including the job expenses we moved), and then your operating expenses below that. This gives you a much clearer view of your gross profit.
If you see direct job costs still sitting in the Expenses section, that’s a sign they need to be recategorized. Knowing where things belong helps you understand whether your categories are set up correctly.
Hopefully this helps you get your Chart of Accounts organized the way you want it. The top priority is always accuracy—your reports should reflect reality so you can make better decisions in real time. Creating the right categories, moving them where they belong, and cleaning up sub-accounts will help you get there.
Be sure to like and subscribe. I have many new videos coming soon, so feel free to ring the bell as well. Cheers.
Hi, Kerry here from My Cloud Bookkeeping. I work with small businesses and entrepreneurs to help them get set up in QuickBooks Online. One of the main questions I’m asked is, “How do I categorize things properly?” And as you may have noticed, the interface in QuickBooks Online has completely changed again. So I thought it might be time to revisit how you can add and edit your categories in the Chart of Accounts.
The categories in the Chart of Accounts feed your income statement and your balance sheet. At the end of this video, I’ll show you how to run your reports to make sure the information flows through as it should and that your reports are accurate. Be sure to stay to the end so you can understand the results of all your hard work.
Here we are in the sample company. Find your way to Accounting—either in your pinned items or through My Apps → Accounting—and we’re going to open the Chart of Accounts. Once it’s open, you can collapse the navigation bar to give yourself a little more space. Select “New Account” at the top right. I’m going to create an account called Credit Card Fees. The account type is an Expense, which makes sense. The preview at the bottom shows you where it will appear on your Profit and Loss, and in alphabetical order within that section.
When choosing a detail type, please don’t overthink it. I’m selecting Bank Charges. You can also choose whether to make this a sub-account. If I made Credit Card Fees a sub-account of Bank Charges, you’d see it appear underneath in the preview. I’m not going to do that, because I don’t like to post expenses to a header account—things can get messy. So I’ll save this.
Now let’s use the new account we’ve set up. Elsewhere in QuickBooks, these are referred to as “categories,” which can be confusing because they are also accounts in your Chart of Accounts. Let’s create an expense and use the new category. I’ll choose my checking account, enter today’s date, and use the Credit Card Fees category for a $15 charge. Save and close.
Next, I’ll run a Profit and Loss. I always like to go straight to the report after creating or editing a category so you can see where your entries appear. Here’s our Credit Card Fees for $15 under Expenses. This is how you can verify that what you’re doing is flowing through correctly.
Now let’s look at how to edit categories. You may use the navigation bar at the top to move around—there are many ways to get to the same place in QuickBooks, so use whatever works best for you. Editing an existing account is useful when you want to change the name, the account type, or make it a sub-account.
Scrolling into the Expenses section, you’ll see several job-related expense accounts—job expenses, cost of labor, installation, maintenance, and repairs. Typically, these belong in Cost of Goods Sold, and it’s a very common error to see them sitting in operating expenses. These items should be deducted from income so you can see your gross margin.
To change this, I’ll first try to edit the Job Expenses account. When I change the account type to Cost of Goods Sold and click save, QuickBooks warns me that I can’t do this because it has sub-accounts. That’s expected. So I’ll scroll back down and make note of the sub-accounts—maintenance and repairs, installation, cost of labor. I’ll need to remove them as sub-accounts first.
Editing each one, I’ll uncheck “Is sub-account” and save. After removing the sub-account structure, I can go back to Job Expenses and change the account type to Cost of Goods Sold. Now the change saves successfully.
Next, I’ll reassign the previous sub-accounts under the updated Job Expenses category. For each one—cost of labor, maintenance and repairs, installation—I’ll edit the account, change the account type to Cost of Goods Sold, and make it a sub-account of Job Expenses. QuickBooks will now place all of these costs in the correct section of the Profit and Loss.
There are also other job-related accounts such as Job Materials and Job Equipment Rental that should be moved as well. I’m not doing all of them in this demo, but the process is the same.
To see the impact, let’s look at the Profit and Loss again. Now you’ll see your income, then Cost of Goods Sold (including the job expenses we moved), and then your operating expenses below that. This gives you a much clearer view of your gross profit.
If you see direct job costs still sitting in the Expenses section, that’s a sign they need to be recategorized. Knowing where things belong helps you understand whether your categories are set up correctly.
Hopefully this helps you get your Chart of Accounts organized the way you want it. The top priority is always accuracy—your reports should reflect reality so you can make better decisions in real time. Creating the right categories, moving them where they belong, and cleaning up sub-accounts will help you get there.
Be sure to like and subscribe. I have many new videos coming soon, so feel free to ring the bell as well. Cheers.
Still need help?
Check this out.
Let's go!Still need help?
We have what you need. Check out our courses and free resources to get more help managing your finances.
Let's go!